The kitchen smells like a winter forest: brown butter, citrus peel, and the faint resinous note of pine from the box of cookie cutters I dragged out of the attic. Flour dusts the countertops like a fresh dusting of snow. My hands remember the rhythm — scoop, cream, roll — but the beauty of cut-out sugar cookies is how predictable technique meets the unpredictable sparkle of decoration. For Christmas trees and stars, the right cookie is less about strict perfection and more about achieving that satisfying snap at the edge, a tender bite in the middle, and a surface that takes colour like snow takes the night sky.
The Dough: Choosing the Right Cut-Out Base
There are as many sugar cookie doughs as there are ornaments on a mantel, but the best ones for trees and stars share certain qualities: they roll smoothly, hold edges, and flatten minimally. A classic butter-based sugar cookie — heavy on butter, just enough sugar, a whisper of vanilla and lemon — gives flavor and structure. The butter does the heavy lifting in taste, while a small amount of cornstarch or a gentle touch of cream cheese can lend a softer crumb without sacrificing shape. If you want that clean, sharp silhouette for a star’s points or the tiers of a tree, reduce baking powder and rely more on chilling to keep the dough from spreading.
Workable, Chillable, Trustworthy
Think about the dough as a seasonal fabric: it should be pliable but not limp. Chill is your friend — after mixing, wrap and refrigerate for at least an hour. Cold dough cuts like butter on a cold knife, and the edges stay crisp while the center bakes to tenderness. Roll between sheets of parchment for even thickness and to avoid excess flour, which can toughen the cookie. When transferring cut shapes, use a thin metal spatula; it keeps triangles and star points pristine. Pause often to press seams together with your fingertips — sometimes imperfect edges are the most inviting, but for tree and star silhouettes, a little precision goes a long way.
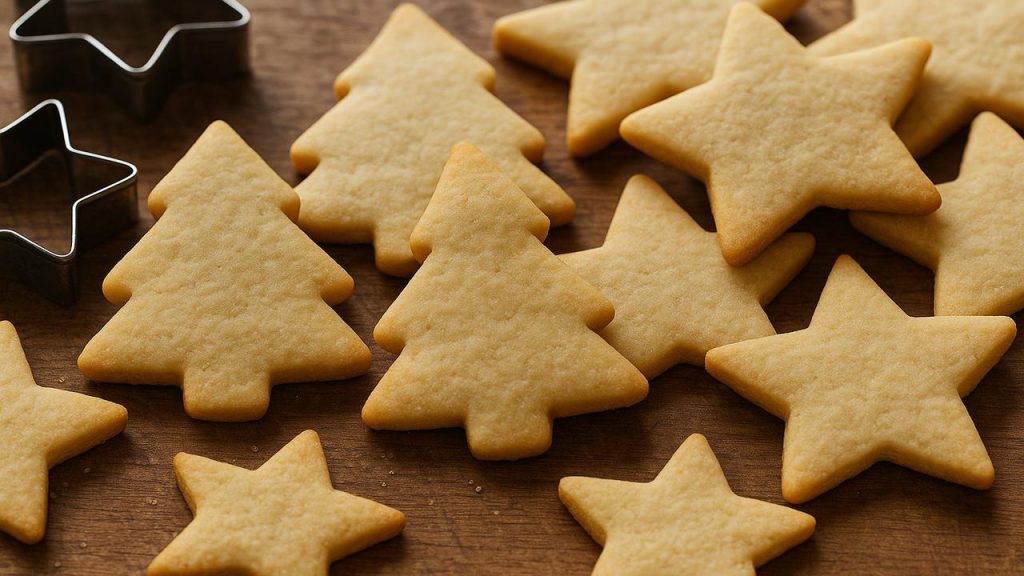
Shapes That Sing: Trees, Stars and Tiny Forests
Shapes matter because they tell the story before the first bite. A Christmas tree cookie is a blank cedar, a place to pin memories with icing garlands, sprinkles like baubles, and a star perched at the tip. Stars are tiny constellations, forgiving of uneven arms and generous with charm. When cutting, rotate rather than re-rolling dough constantly; over-handling creates toughness. For variety, mix sizes: bake a row of tall trees, medium stars, and a handful of mini-trees that look like playful saplings. Line them up on a tray and you get the sense of a winter landscape, a simple scene that becomes complex once color and sparkle arrive.
Bake for Texture: Crisp Edges, Tender Centers
Baking is alchemy. The oven door is the hearth that decides whether the cookies hold their shape and texture. Preheat thoroughly and bake on a middle rack for even heat. Thicker cookies will stay tender inside while giving the slightest crisp to edges; thin ones become almost biscuit-like. A golden hint on the underside means caramelized sugar and depth of flavor; pale tops let your icing speak on a clean canvas. Rotate the tray once mid-bake if your oven runs hot on one side. Cool completely on a rack before decorating; warm cookies will make icing run and colors bleed like watercolor into snowmelt.
Glaze, Icing, and the Little Decorations That Matter
There’s a special hush that comes with the first drop of icing on a cookie. Royal icing creates claimed tidelines and is perfect for crisp outlines and delicate lacework; a thicker consistency holds up to piping stars and tree ornaments, while a slightly thinned “flood” consistency fills fields smoothly. Buttercream is a friendlier, softer option for a rustic, textured fir branch look and will give you that melt-in-the-mouth feeling. Sprinkle sparingly — a few coarse sugars or tiny nonpareils act like snow or ornaments without overwhelming the palate. If you love a rustic aesthetic, a quick dusting of powdered sugar after icing dries evokes frost more elegantly than clashing sprinkles ever could.
Tools and Tricks: Cutters, Spatulas, and Portable Flavor
Simple tools, well used, change everything. A set of star and tree cutters in a few sizes lets you compose scenes and stack cookies into edible ornaments. Chill sheets between batches to keep cutters from warming the dough. Use a turntable or lazy Susan for steady piping, and a disposable piping bag makes cleanup easier when colors get wild. Small alcohol-based food colourings keep icing from getting watery; little lemon or orange zest folded into dough adds bright notes that taste of sunlight on a cold morning. Below is a compact table of practical choices that fit a holiday baker’s pocket and are designed to display neatly on phones and narrow screens.
| Item | Why it matters | Quick tip |
|---|---|---|
| Metal cookie cutters (trees & stars) | Sharp edges = crisp silhouettes | Dip in flour, tap out excess |
| Thin metal spatula | Eases transfer without distortion | Slide under shape, lift gently |
| Parchment or silicone mat | Prevents sticking and helps roll evenly | Roll between sheets for uniformity |
| Royal icing mix or powdered sugar | For bright, detailed decoration | Divide into bowls; colour carefully |
When everything comes together — a crisp-edged star with a crown of royal icing, a small tree streaked in edible gold dust — there’s a moment that feels almost ceremonial. Arrange them on plates, bundle a few in waxed paper tied with twine, or let children loose with sprinkles and giggles. The final joy isn’t perfection; it’s the warmth of hands flour-dusted and the hush that follows when everyone tastes that first cookie of the season.
FAQ
Q: Can I use the same dough for other shapes?
Yes. The same buttery cut-out dough works for any cookie cutter as long as you roll to even thickness and chill the dough between rollings to maintain edges.
Q: How do I prevent cookies from spreading?
Keep butter at a cool room temperature when creaming, use minimal leavening, chill the dough well, and avoid overworking. If spread persists, reduce oven temperature slightly and bake on a chilled sheet.
Q: Which icing is best for detailed work?
Royal icing is ideal for detailed piping and outlines because it dries hard. Adjust consistency: thicker for piping, thinner for flooding.
Q: How far ahead can I make cut-out cookies?
You can bake cookies and store them in an airtight container for up to a week. Freeze undecorated baked cookies for up to three months; thaw fully before icing. Dough can be refrigerated for 2–3 days or frozen for up to a month.
Q: Any tips for kids decorating?
Give them large brushes or simple squeeze bottles, a few safe colors, and lots of space. Use larger cutters and minimal tiny sprinkles to avoid choking hazards for very young children. Keep the mood playful — the most memorable cookies are often the ones with the most personality, not the neatest piping.